As promised last week, here is the story of the latest “Ultimate Plein Air Watercolor Set-up.” This time, yes, I think I’ve nailed it.
Warning: If you are not a watercolor painter, or even if you are and you never want to paint outdoors on location, you may find this blog post ridiculous.
On the other hand, if you do paint outdoors whenever possible, and you find it frustrating, get ready for some great news. You may already have most of the supplies you need, so the cash outlay could be quite small for the return in joy you will discover.
It all started once upon a time with three metal palettes acquired over several years. Here they are, sitting together like a happy little family.

The small one on the left may look familiar: it holds 12 half-pans, or 6 full-pans, and has been my reliable companion for more years than I can count.
Next, one size larger, is the Mama Bear of metal palette boxes made to hold 24 half-pans, or 12 full-pans. Being made of metal too, it is a noticably heavier.
Finally, the Papa Bear size, designed to hold (you guessed it) 48 half-pans, or 24 full-pans. When fully loaded with paints, it is four times as heavy as the junior size one on the far left.
I confess, I bought this largest one four full years ago and I’ve never used it as designed, not even once. It wasn’t expensive, but once I had it in hand, I knew it would be useless for me out on location because of its weight when fully loaded. What was I thinking? Still, I knew it had potential…
Then I discovered my Inner Inventor!
I asked myself, “What is the hardest part of plein air sketching?”
“Is it balancing the sketchbook and a simple pencil?” Never.
“How about a sketchbook, a water-soluble pen, and a water brush?” No problem.
“What about a sketchbook, a tiny palette, and a water brush?” Still no problem.
“But what if I want more? What if I want to use:
- a few of my regular watercolor brushes I love,
- with a cup of real water,
- and a reasonable selection of watercolor full-pans,
- and have plenty of space to mix up deep, juicy puddles of color,
- while sketching standing up, perhaps leaning against a tree,
- easily holding everything I need,
- with no chance of spilling it all over my sketchbook as the whole thing tumbles to the ground?
- What if I want to do that?”
I now have the answer!
Step 1: Brushes
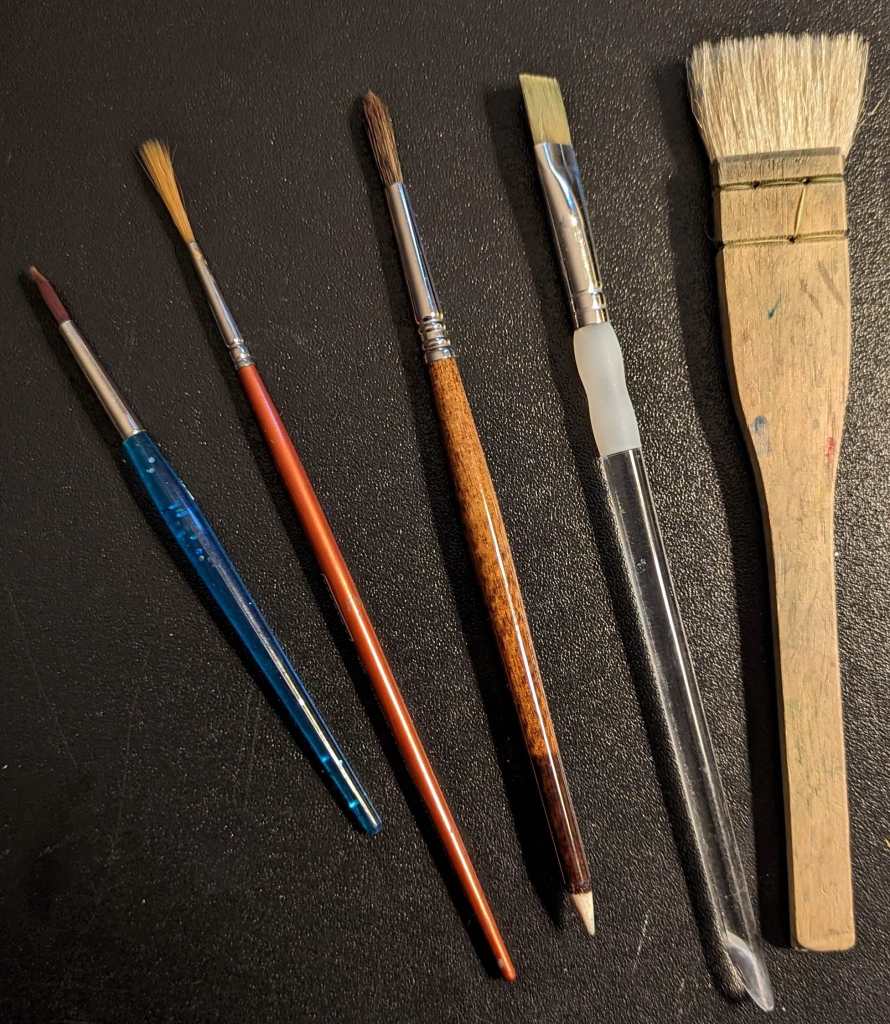
Gather up your five favorite brushes, no more. I recommend a #8-10 round, a ½” flat, a rigger, possibly a #4 detail brush, and a big fat brush, like a 1” flat.
For the “big flat” I use a well-loved, much-used Ron Ranson hake. It takes quite a lot of practice to get used to a hake, so substitute any big flat brush you like for those giant juicy washes.
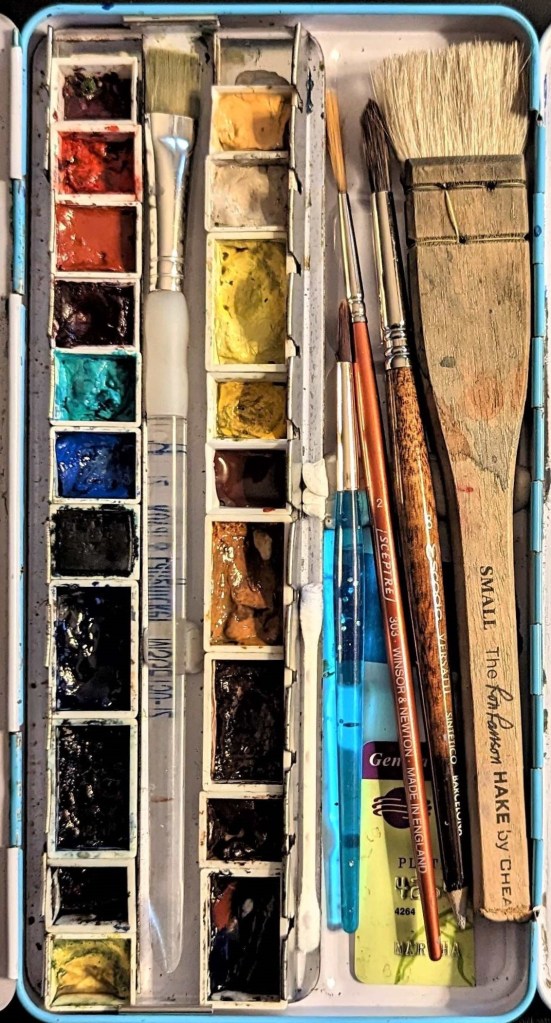
Here are my current workhorse brushes:
Step 2: Tack
Grab a small wad of poster putty/ blue tack, whatever it’s called in your country. I used this for all sorts of things.
Step 3: Colors and palette guts/ frame
If you have one of those small palettes full of pans of your favorite paints already, open it up and pull the frame out. This is easily done; just leave all the colors in the metal frame and pull the frame itself out. When empty, the frame looks like this:
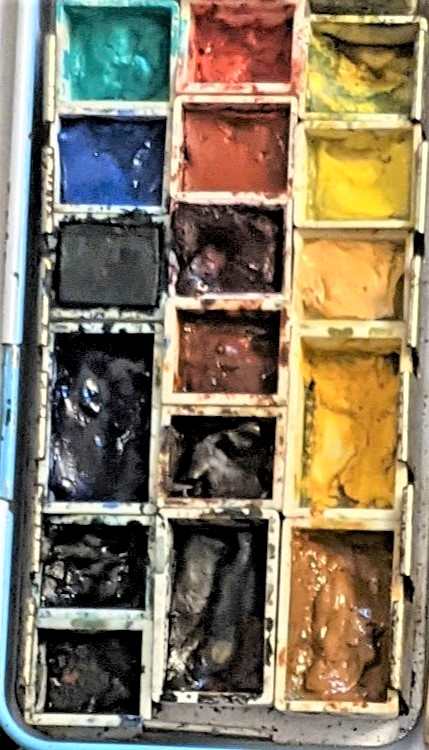
Below are photos of the small and mid-size frames filled with my favorite half-pans and full-pans. (I currently am using the mid-size frame.)

If you hoard art supplies, there’s a good chance all you’ll need is the “Papa Bear” empty 48-color-size Meeden palette box. It’s about $18-20 at common online stores, including Amazon. If you can only find the “52” half-pan size, that’s fine. You’ll be using that poster putty to keep things secure anyway.
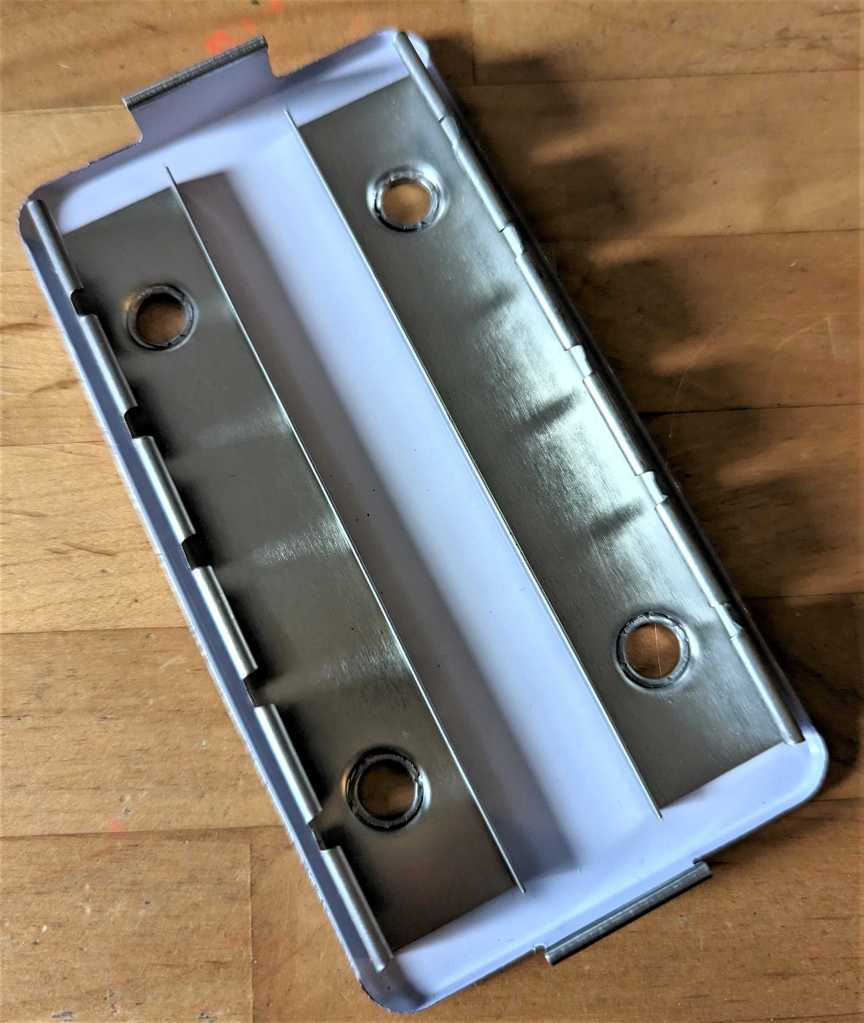
Step 4: Assembly time!
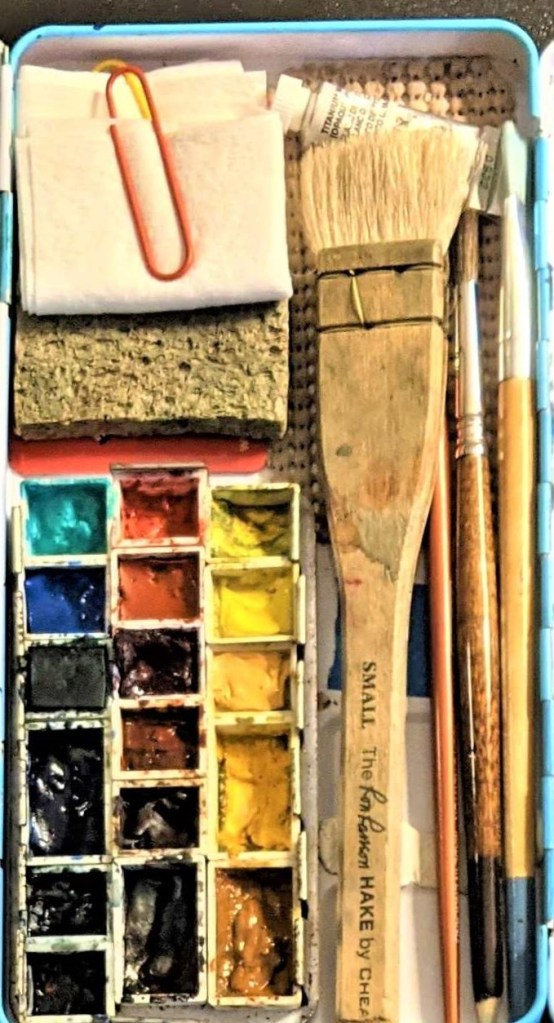
Have some of that poster putty handy, you’ll be using it. Get out your new Meeden palette box and remove the frame inside. You can set that aside for use in the distant future if you like. This photo shows the empty box with poster putty in strategic locations. It weighs next to nothing.

Make sure you have a bit of putty in all the strategic places, then press in your color frame, brushes, and maybe include a bit of cut hard plastic if you like, to use for scraping effects. Here are photos of both versions:
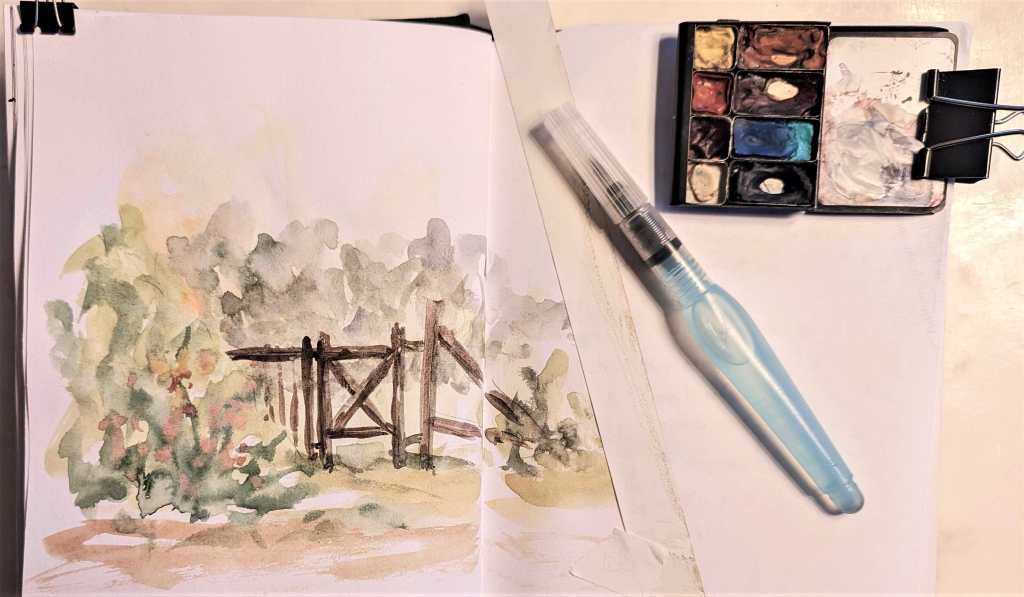
Step 5: But what about the water?
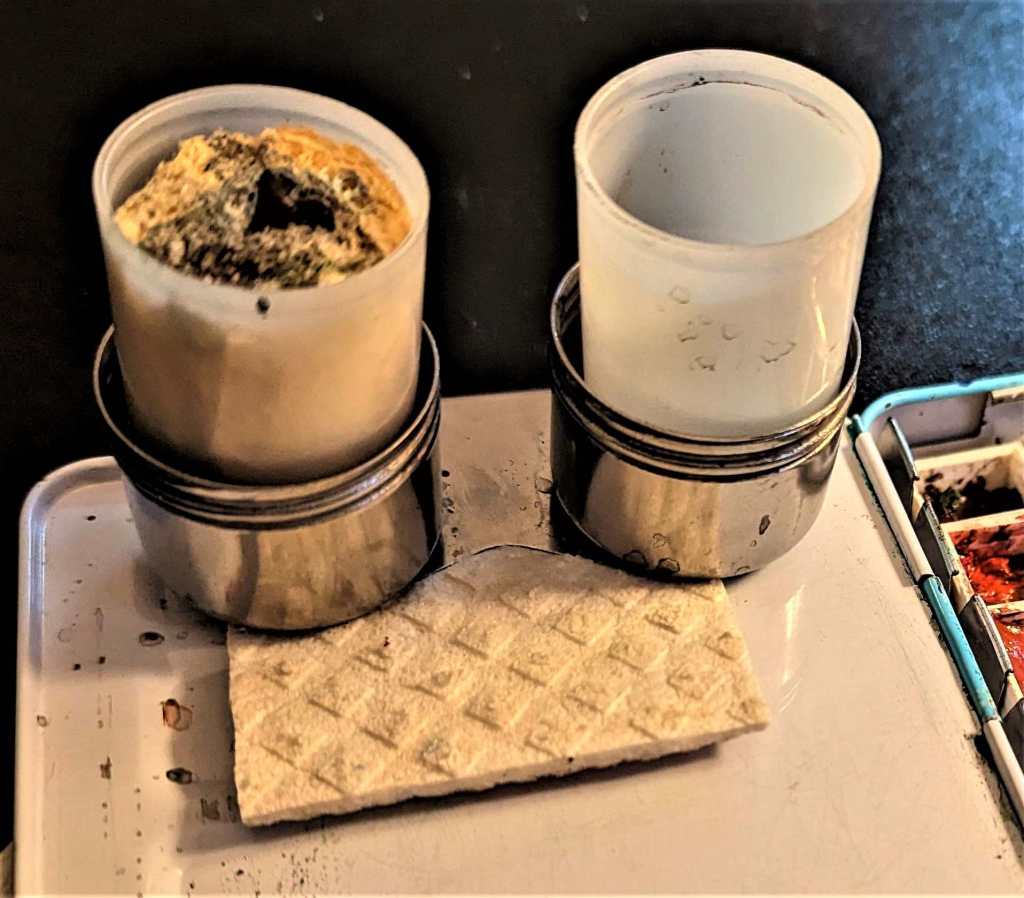
I’m so glad you asked. Years ago I purchased a little clip-on double turpentine holder, available from any art supply store. The wells were not deep enough to hold the amount of water I wanted, so I used poster putty to adhere two old 35mm plastic film canisters inside the cups (makes it easier to not spill the water too). You could use small prescription/pill bottles instead. I fill one bottle with water and leave a bit of sponge in the other one. Dabbing your brush on a sponge right after you rinse your brush is a great habit; having the sponge right next to the water makes it even easier. Here are the photos. Note: I tuck a bit of towel between the palette flap and the water container to make sure it’s a good solid fit.

Step 6: The board that hooks your paint and water to your sketchbook
Cheap or free are my favorite ways to invent things. Coroplast (also known as Biplex, Polyflute, Proplex) is corrugated plastic, a very versatile material used in some DIY applications, as well as for printing roadside advertising signs. You can purchase it at DIY stores or art supply stores, but I have an even better place to get it if you’re patient and clever.
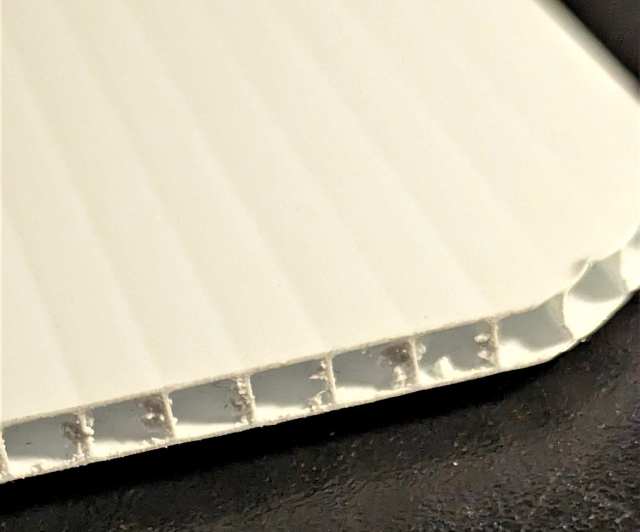
The thing is, this stuff is not environmentally friendly at all. That makes it durable for outdoor lawn advertising signs like roadside event notices, real estate for-sale signs, and political campaign signs (ample here in NH every 4 years). The sad news is that after the walkathon is complete, the festival is finished, or the election is over, those signs often become roadside litter, getting blown into the hedges and tall grass near roads, eventually broken into bits but never becoming useful compost.
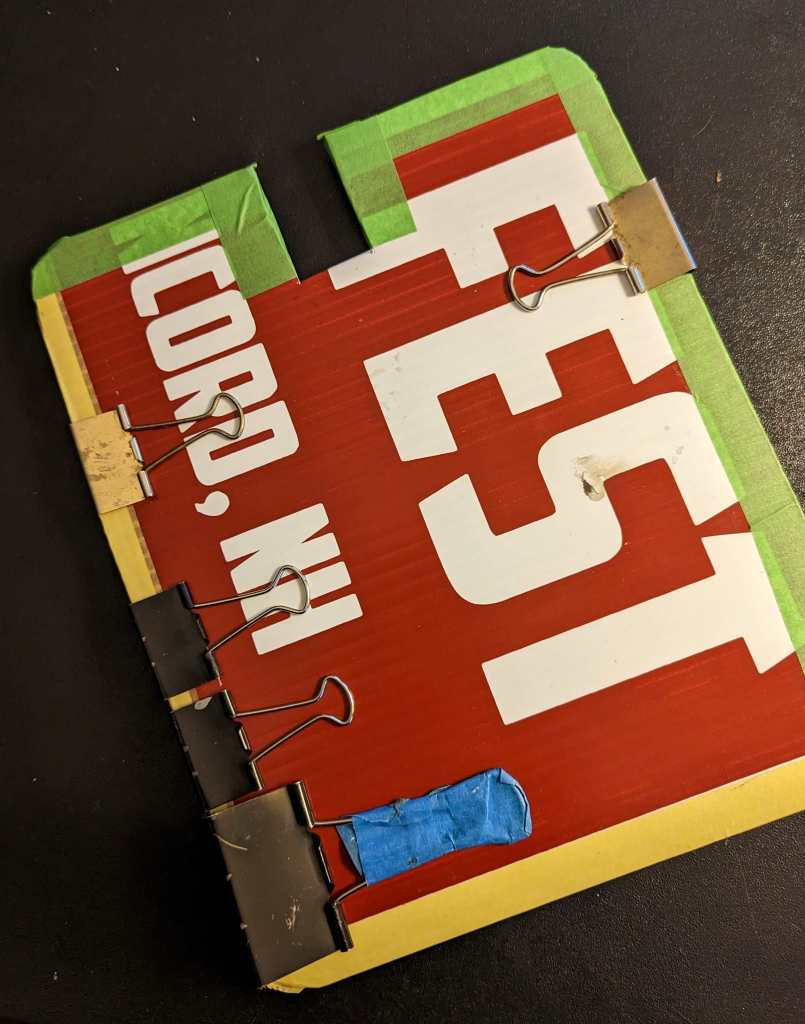
I found the board I use now while walking along a road a few years ago. It was spattered with dirt and debris, but it rinsed off easily and makes me smile every time I see its proclamation of “Fest” and “–ncord, NH.”
Here are pictures of my well-used board which is cut to purpose (notice the 1″ notch cut along the top edge.)
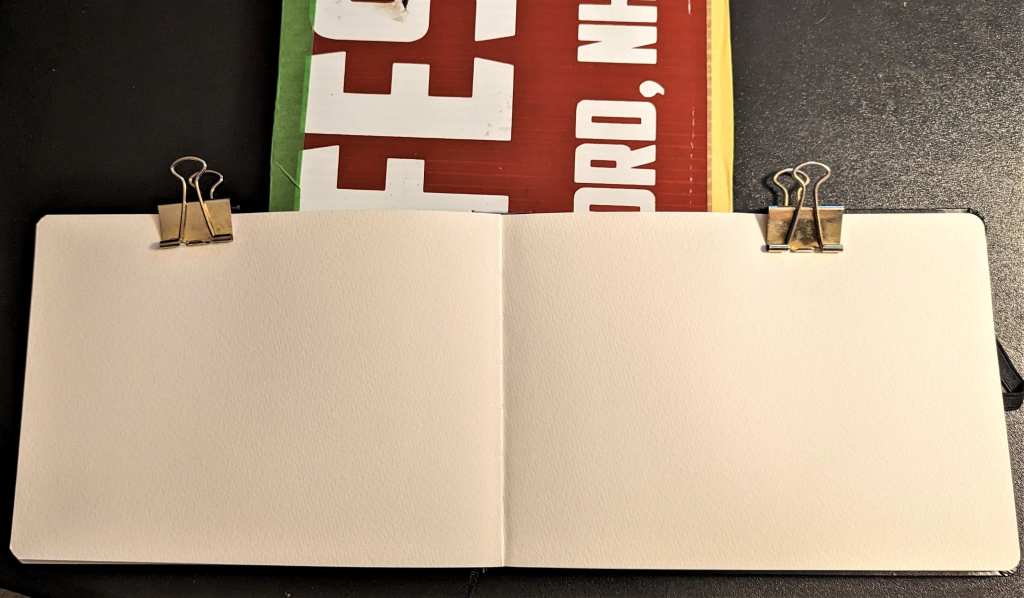
Now all you do is insert that 1″ board slot around the entire set of paper in your bound sketchbook (see below), then open the book to the page you’re working on, and clip the open pages to the back and front covers. See below again. It’s far more secure than you would imagine!
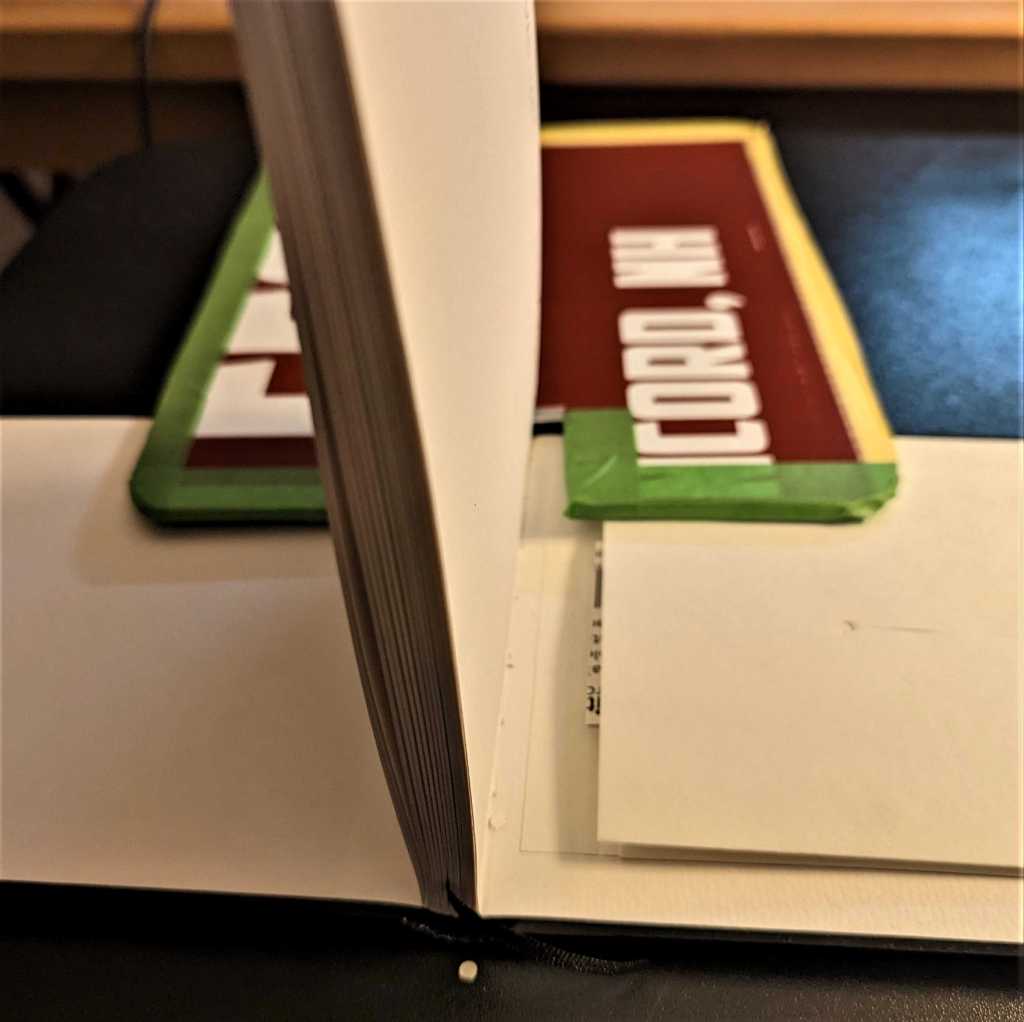
(It works fine with a spiral-bound book too- just open your spiral sketchbook to the page you’re working on, tuck the board between the covers, and clamp it. If you’d like further instruction on that, email me at the contact link above, and we’ll talk.)
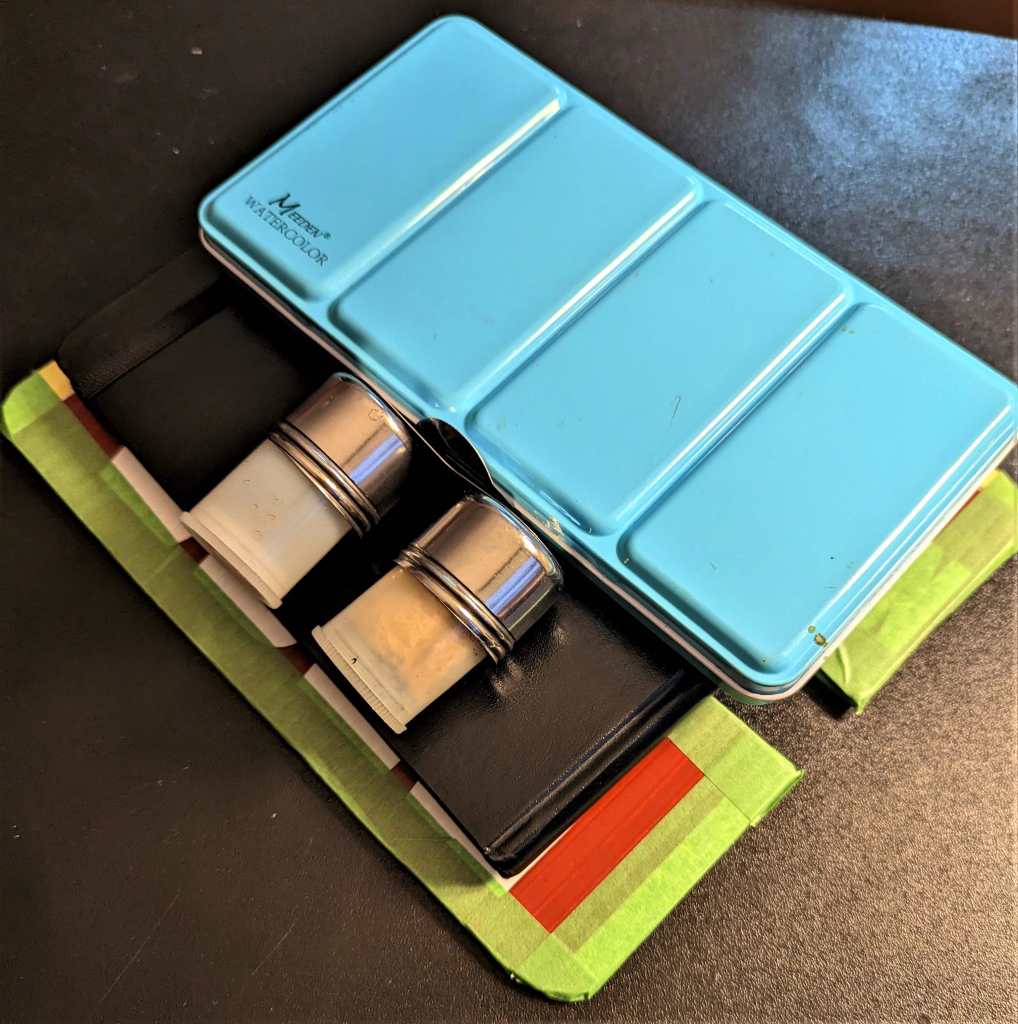
Finally, the fully opened palette box (complete with paint, brushes, water, sponge) gets clipped on the right side to the board which is underneath. Now you simply hold it on your free hand, palm facing up, like you’re a waiter proudly holding a tray in a five-star restaurant.

Look at all those big beautiful color mixing areas on the far left and right! That’s what I wanted most of all: to have room to create big puddles of premixed paint, so when I work wet-in-wet in a gentle breeze, the mixes don’t all dry up before I’m finished!
The entire kit, including board, sketchbook, palette kit and water pots measures a mere 8” x 10” x 2.25”tall, and weighs in at slightly less than 2 pounds or .85kg. Lightweight and very portable.
Step 7: Go outside and play!
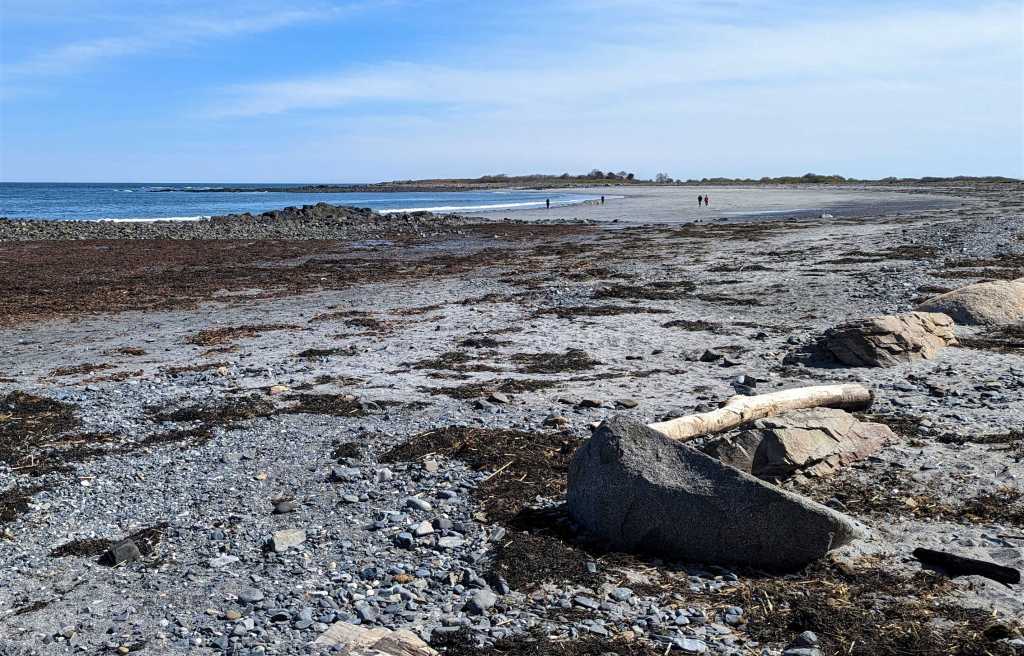
This winter I tried it out here in my home, and neighborhood, and all went well. Now that it’s springtime, I took it for a real test drive at the seacoast, where a gust of wind out of nowhere is to be expected. No problem!
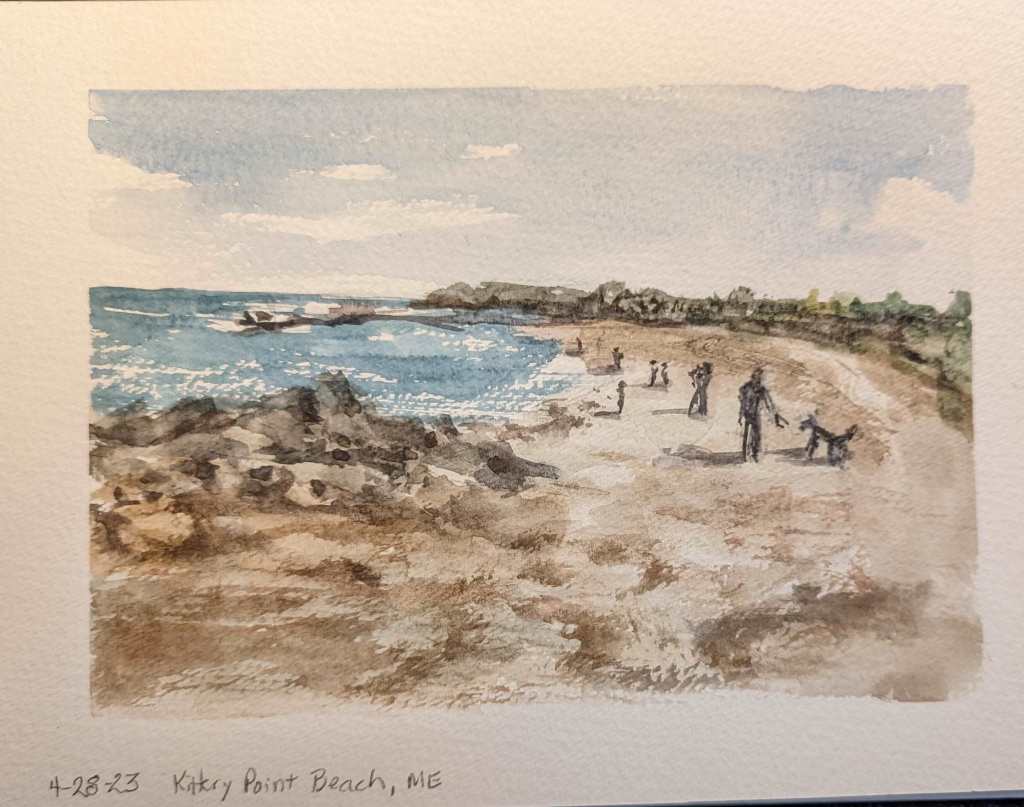
The kit worked perfectly. It will take some practice to get the set-up sequencing down to a routine but all in all I’m very pleased. I like it even better because I’ve walked you through all the steps so you can create one for yourself if you like, or a customized version that suits you even better. This was much more fun than taking one photo and saying, “Look what I invented, ta-daaaah!”
Creativity comes in many forms, including repurposing and reinvention. Do whatever it takes to make your plein air time as joyful as possible. I did.
The experience of painting outdoors, with all its multisensory stimulation, is not to be missed. The sounds of birds, the scent of the sea breeze, the barking of dogs in the distance, will mix magically in with your paint, and it will show in your final masterpiece du jour.
Make it as easy as possible to enjoy your time sketching and painting. That’s the whole point, right?
*******
If you find these posts valuable, please consider making a contribution of any size to The Tip Jar. It helps keep this website solvent and is greatly appreciated!
As always, feel free to forward this post to anyone you think might enjoy it.
Questions? Comments? Public comments can be posted below.
Private questions or comments will reach me by using the Contact link here.
And, as always, thanks for joining me in some time “aloft”!

This is a great article I shared with my fellow students in one of Jane Blundell’s classes. Such a great idea to use those pesky yard signs. LOVED this article! You don’t have to spend a lot to have a nice working palette!
I made a sketch board some time ago out of the corrugated PVC board I picked up from Michaels. It’s super lightweight and sturdy but I placed the two pieces I used with the ridges vertically and horizontally for extra strength, then added strips of Velcro (hook and loop material) to the board to hold my palette, mixing surfaces, and water. I even added a Velcro strip to my Rosemary & Co leather travel brush wallet to secure it on my board. Works great!
LikeLiked by 1 person
That sounds brilliant! I recently realized I love inventing things, repurposing things, as much as I enjoy sketching. Thanks for sharing this, we all co-invent, right? 👍❤️
LikeLike
Thanks for this Bobbie. I always love looking at other people’s painting kit and I think you’ve come up with a cracker! I like the idea of the easy set-up process as I normally carry my brushes etc separately and then have to juggle getting it all out and then holding the brushes in my spare hand as I paint.
I tried out your idea with a tin I had at home and some pans of paint, but I have a question. How do you stop your brushes getting covered in paint when you store everything away? Mine just got mucky!
LikeLiked by 1 person
Thanks Andy, glad you gave it a go. When I first refill my pans, I let them dry enough to “skin over” before I take them out for a walk. Then, when painting, the breeze usually helps to speed up that drying process of both the paper and the palette.
The shoulder bag I use to hold my extras like a sketchbook, water bottle, keys, phone, and wallet is a hard plastic cooler bag (designed for a 6-pack of beer or soda), and the bottom of it is the exact size of my Meeden palette. How lucky! That way, even when walking, my Meeden palette sits flat on the bottom of the cooler.
I too am fascinated by other people’s kits. I want to have everything I could possibly need, in a very small container, ha! Reducing my “needs” seems to be the best solution, right?
LikeLike
You have a wealth of experience to draw on, for sure, but you are still incredibly inventive!
LikeLiked by 1 person
Thanks Jill! I love being “inventive”, don’t know whether I’m a troubleshooter or a troublemaker! 😆
LikeLike