Have any of you noticed a pattern to these watercolor secrets so far? In these first five tips, the water and the watercolor have not yet touched the paper!
There’s a reason for that. Once you learn these secrets, this gentle methodical approach enables you to avoid The Cringe.
You know The Cringe, right? It happens when the beautifully pigmented water hits the paper and suddenly it feels like everything is out of control. You start mopping with your brush or a tissue and the mess gets even worse. That’s why people give up. That’s why people think watercolor is difficult. It’s not hard at all if you make friends first.
So, let’s look at one more prep-step so you will know everything you need to know about:
wetting the pigments,
scooping water up with your brush,
then mixing the water and the pigment, just a bit, on your mixing area.
Secret #5 – How large is your mix? (Or, “Evaporation Happens!”)
Most people don’t know that every watercolor kit comes with an invisible starter gun that will mark the beginning of your Evaporation Sprint. That is why you’ll want to practice getting comfortable first, having all the supplies you plan to use laid out and handy, have a fully activated pre-wetted palette of colors, as well as a delightful puddle of premixed color in your palette, all before your first brush mark hits the paper.
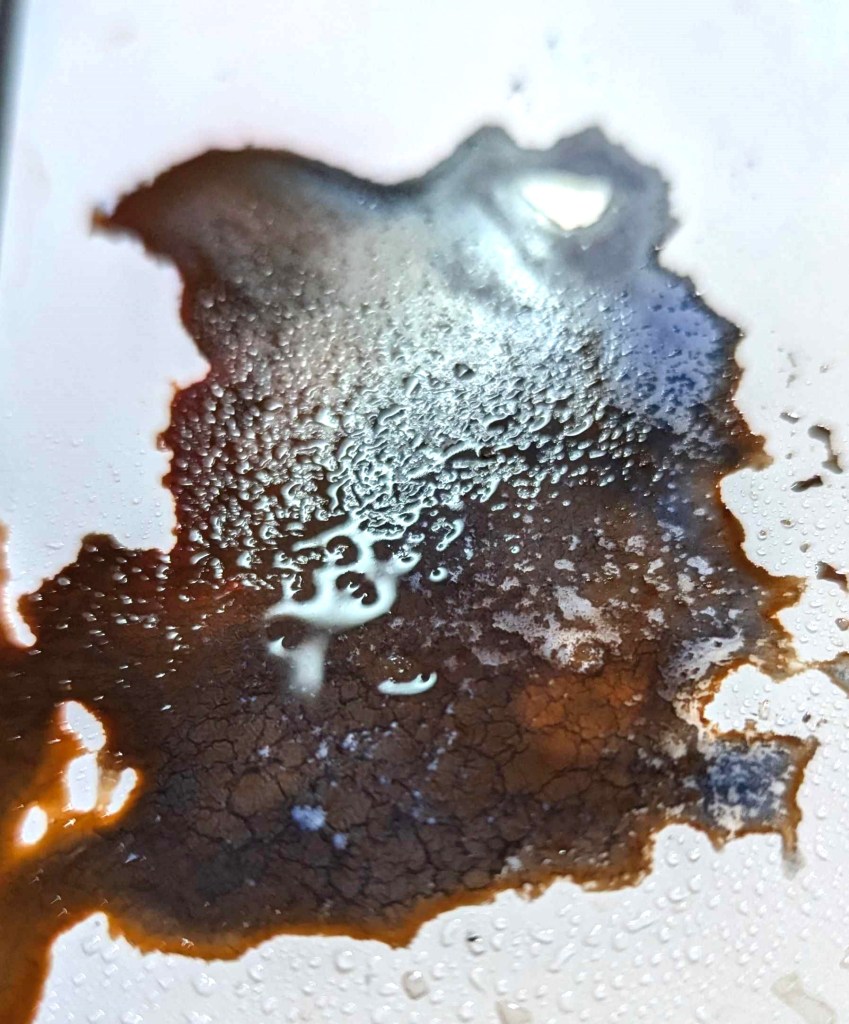
Here’s another shocker: did you know that while the paint is drying on your paper, it is also drying on your palette? YES! The pans and the mixing area heard that starter gun too and that perfect color puddle you mixed is getting smaller, drier, and darker by the minute, thanks to evaporation!
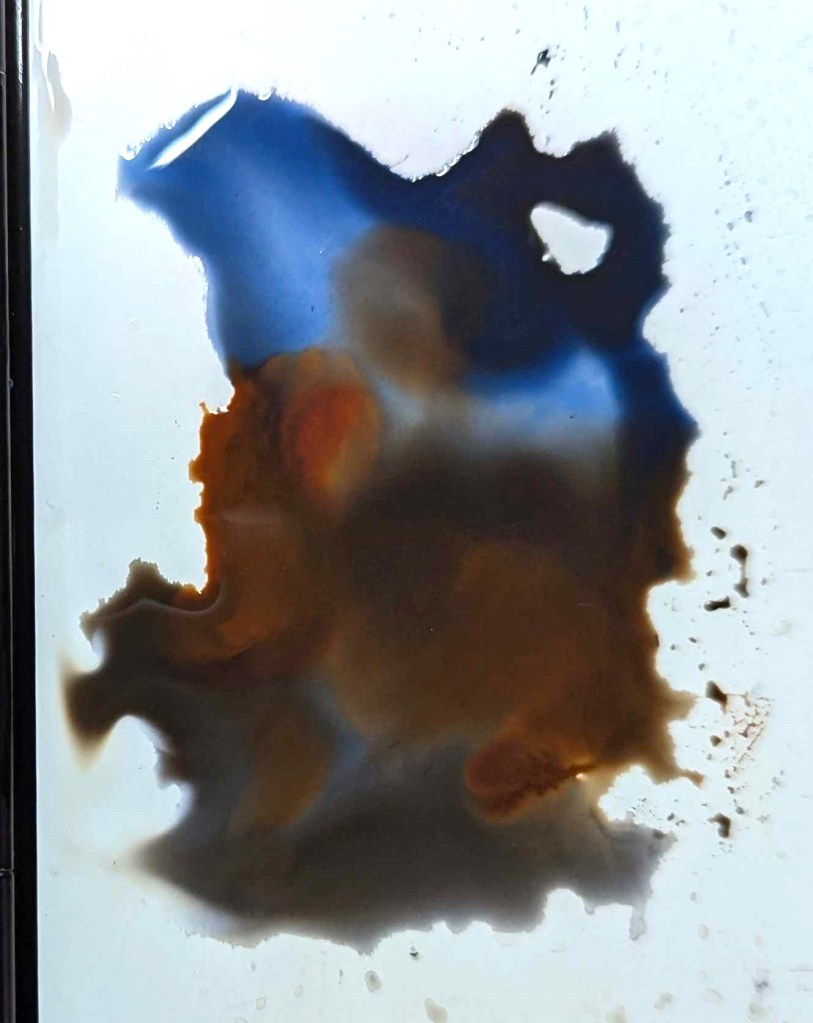
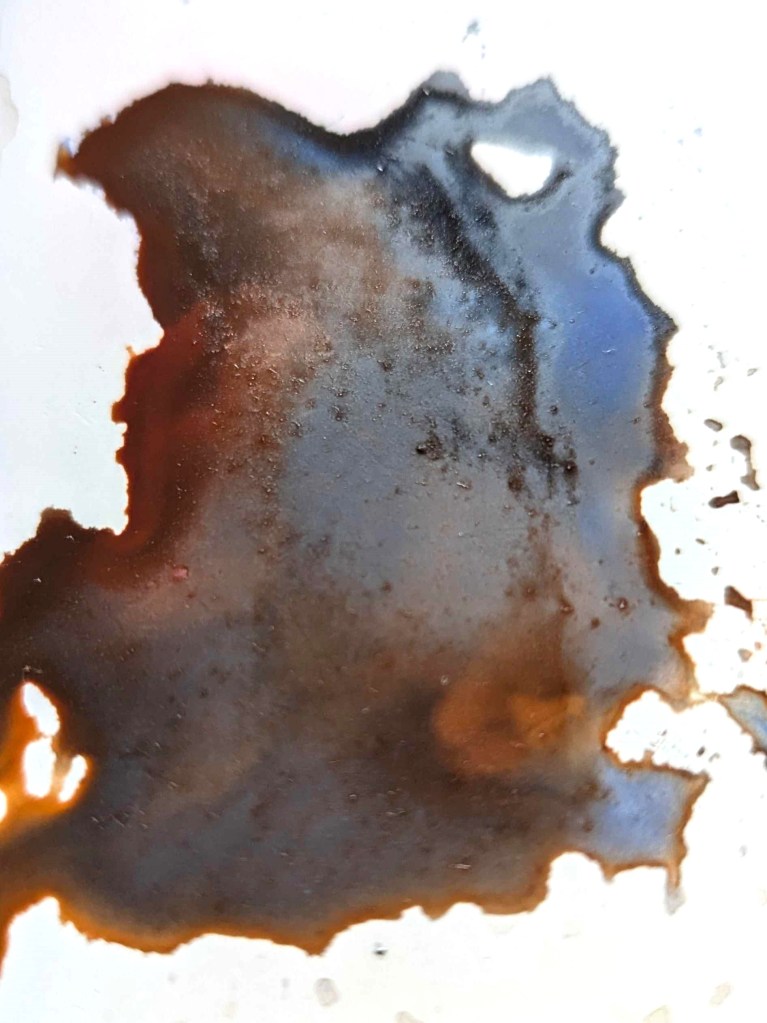
(Watch a perfectly good puddle dry out: the evaporation is happening as the right edge of the puddle dries first.)
That’s why you should mix up almost twice as much paint as you think you will need. And remember, to get the value you want, you must have plenty of both water and pigment of course.
It helps to have a small portable water mister handy to lightly spray on your palette colors periodically as you paint, as well as on your mixing area.
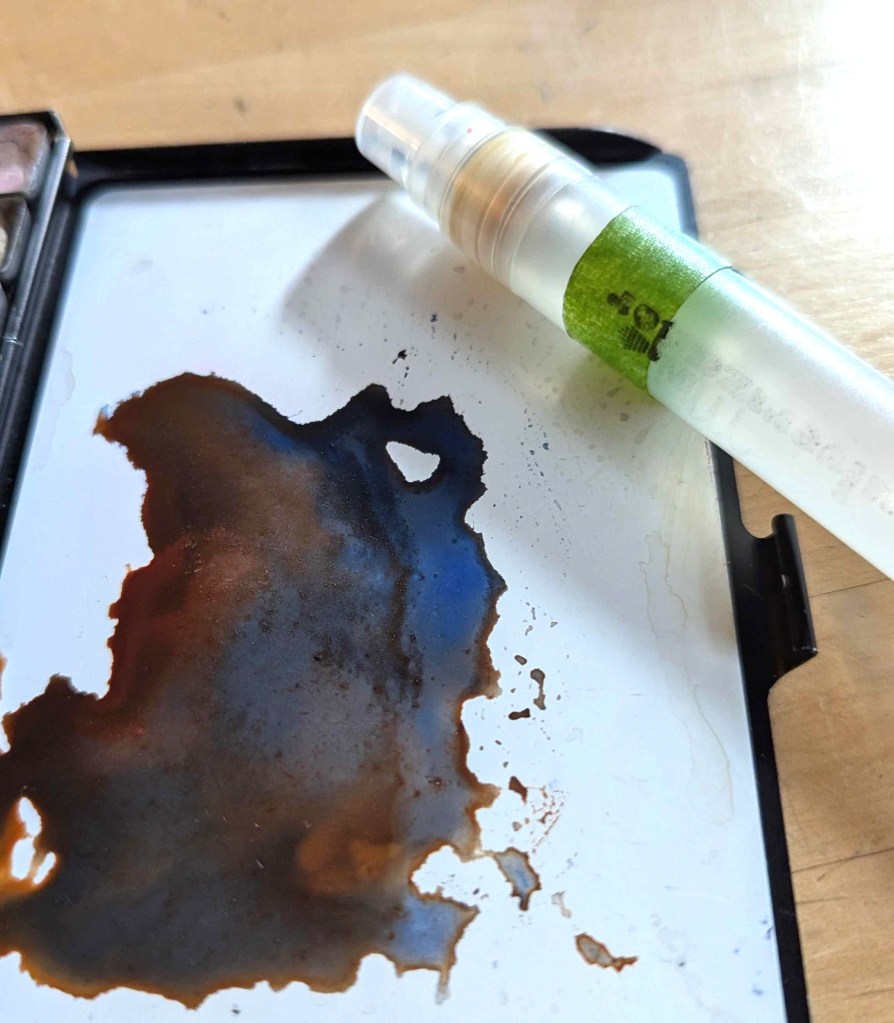
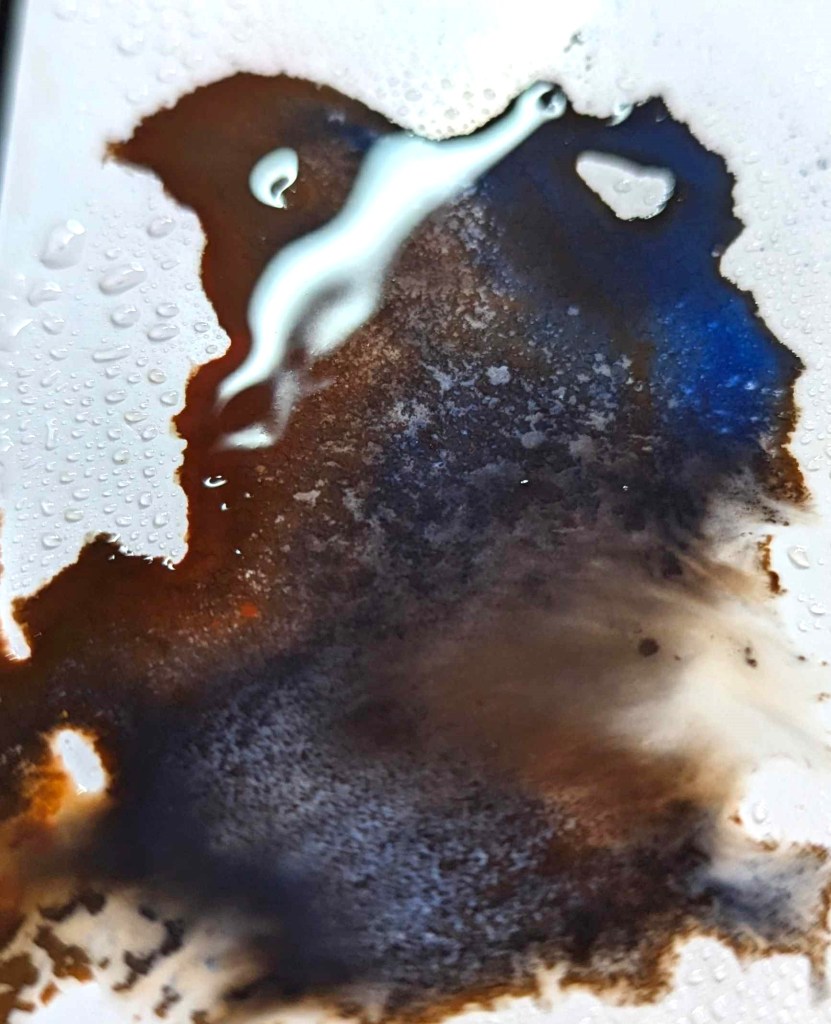
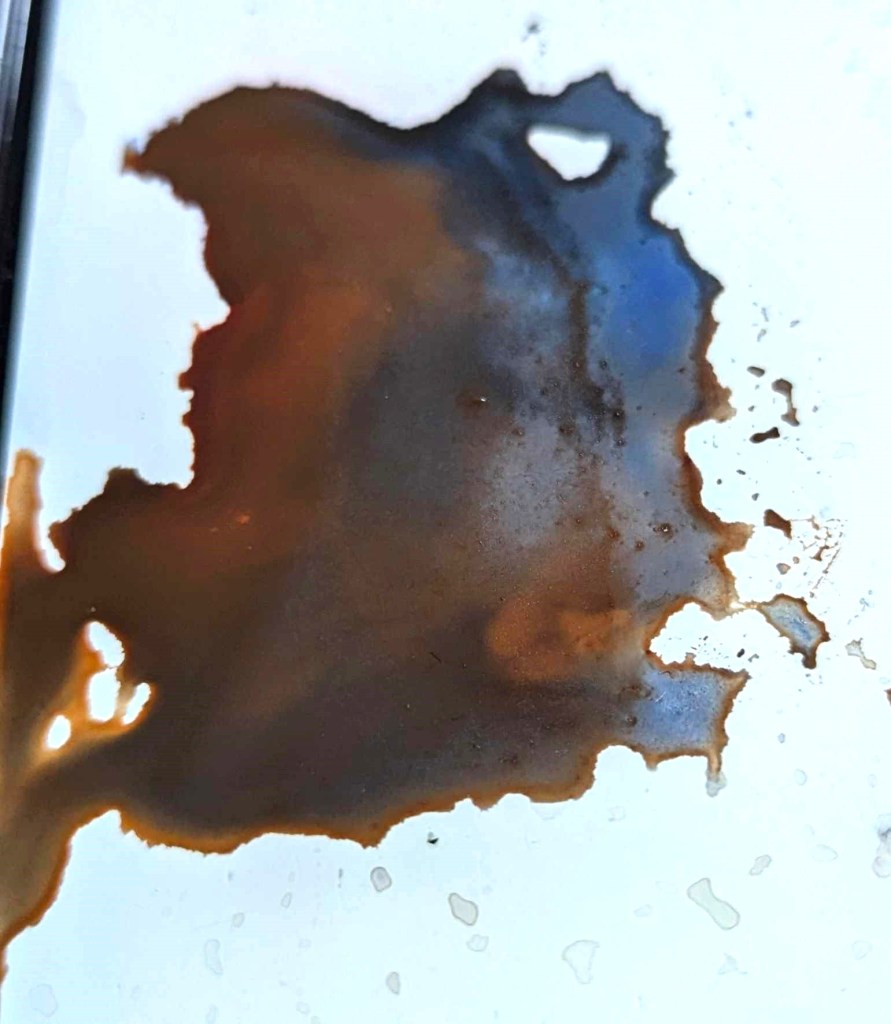
(From left to right: A mix that was bone dry can be fully reactivated! A small portable mister allows you to rewet your mix without diluting it too much. It is much faster and easier to rewet a good mix than to start from scratch trying to recreate it with fresh water and paints.)
Try to get a mister that sprays a very fine mist rather than droplets. With a little practice you will not only be able to use your mister on your palette colors and mixing area, you can also lightly use it on your painting mid-session. Such fun experiments!
~~~~~
*** If you would like to purchase a copy of “Look at That! – SECOND EDITION” be sure to look for the version with the green stripe down the left side of the cover, and the words “SECOND EDITION” in the blue cloud at the top of the cover. The best shortcuts to find this new book are below: simply click on whatever version you prefer.
“Look at That! – SECOND EDITION”
Note: This latest book is available on Amazon and at my local bookstore, Gibson’s, here in Concord NH. Please contact me here if you do not use Amazon and would still like to purchase a paperback or hard cover copy of Look at That! – Second Edition.
Feel free to forward this post to anyone you think might enjoy it, or re-post it on social media.
If you find these posts valuable, please consider making a contribution to The Tip Jar. It is a secure site, it helps keep me and this website solvent, and is greatly appreciated!
Questions? Comments? Public comments can be posted below.
Private questions or comments will reach me by using the Contact link here.
And, as always, thanks for spending some time “aloft”!
